


Styling A Dessert Table That Guests Photograph First
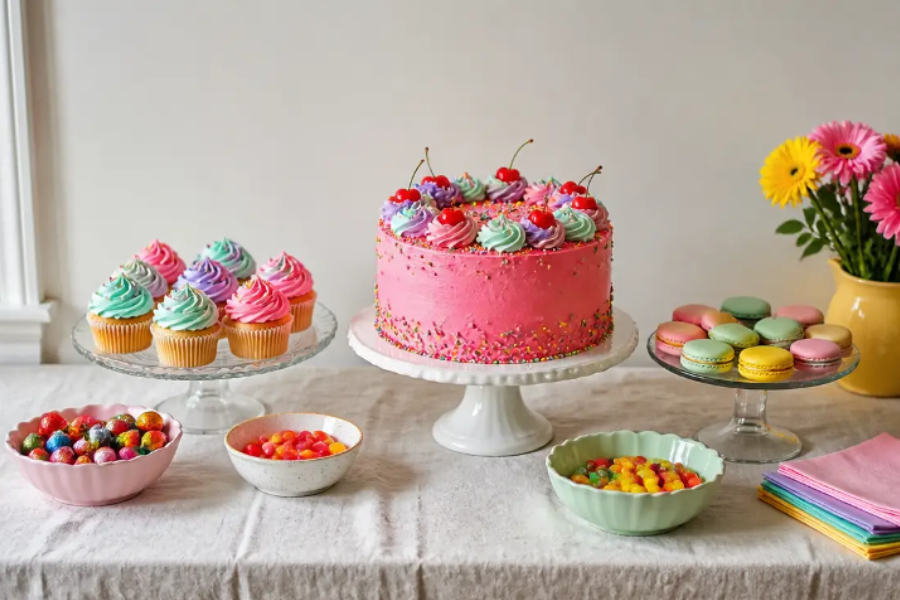
You spent a fortnight choosing the cake. It arrives, it is beautiful, and you put it on the dining table next to a stack of paper plates, a half-empty bottle of Coke, someone’s car keys and a bag of prawn crackers. Two hours later you scroll through the photos and every single one has the prawn crackers in it.
The cake is rarely the problem. The eighty centimetres of table around the cake is the problem. A dessert table takes about twenty minutes to style and it changes every photograph taken that evening, which for most parties means it changes the entire visual record of the day.
Start by choosing the wall, not the table
The first decision is where the table goes, and the deciding factor is what sits behind it. Whatever is on that wall will appear in every photo taken all evening.
Look for a plain-ish stretch of wall with no light switch, no aircon unit and no doorway. In most Singapore flats the best option is the wall opposite the main window, because it catches daylight without anybody being backlit. If your only clear wall is dark, that is fine and often better; dark backgrounds make a pale cake pop.
Avoid the wall with the family photos. Guests will crowd in front of it, and a hundred candid shots of your party will have your cousin’s wedding portrait floating over everyone’s heads.
Build in three heights
The single change that makes a home dessert table look styled instead of loaded is height variation. A flat table of flat things reads as a buffet. Three levels reads as a display.
You almost certainly own everything you need. Stack two hardback books and throw a cloth over them. Turn a mixing bowl upside down. Use a cake stand for the main cake, a shallow plate at table level for smaller items, and something raised at the back for anything tall. Put the tallest elements at the back and slightly off-centre, never dead middle.
The cake goes at the highest point that still lets a short guest see it properly, which in practice means about fifteen to twenty centimetres above the table.
Give the centrepiece room to breathe
Whatever the main cake is, leave a clear ring of empty space around it. Crowding is what makes a table look like a potluck.
This is doubly true for anything with a reveal element. A pinata cake, which is a cake with a hollow shell that the celebrant knocks or cracks open to spill treats such as chocolates, gummies and marshmallows, needs physical clearance as well as visual clearance. Treats scatter. If the table is packed edge to edge, half of them land in the brownies.
Explosion bomb cakes need the most room of all. The decorative plastic casing is safely lit and then opens to reveal the cake inside, so it wants clear space above and around it, well away from paper decorations, curtains and anything low-hanging. An adult handles the lighting, and the bakery briefs whoever collects the cake on how the mechanism works.
Limit yourself to three colours
Pick a colour from the cake and build the table from it. Two supporting colours maximum, plus whatever neutral your table or cloth already is.
This is the rule that does the most work for the least effort, and it is also the one people break most often, usually by adding party supplies in whatever colours the shop had. A table of five competing colours looks chaotic even when every individual item is lovely.
If you are unsure, take the palette straight from the cake design and repeat it in the napkins and one other thing. That is genuinely enough.
Things that quietly ruin the photographs
A short list of the usual offenders, all of which are easy to fix once you have seen them:
- Packaging left in frame. Bakery boxes, cling film, the plastic dome from the fruit platter.
- Mismatched serving utensils. Four different spoon designs read as clutter even at a glance.
- Overhead lighting only, which casts a hard shadow directly onto the cake and makes buttercream look grey.
- Drinks on the dessert table. Put them somewhere else entirely, or the table becomes a bar within ten minutes.
- Handwritten labels done in a rush. Either do them properly or skip them.
- A tablecloth that is too short, so the folding table legs show underneath.
Light it before the guests arrive
Stand where people will stand and take one photo on your phone an hour before the party. This takes thirty seconds and tells you more than any amount of arranging.
If the cake looks flat and grey, your light is coming from directly overhead. Switch off the ceiling light nearest the table and bring in something at eye level, a lamp from the bedroom works perfectly. If the room is dim overall, warm light beats bright light every time; the cake will look richer and your guests will look better in the background.
The cakes that travel furthest online almost always share this one quality, and the round-up of 5 viral cake designs makes the point clearly: the design is only half of it, and the light is most of the rest.
Leave one gap on purpose
Style the table fully, then remove one item and leave the space empty. It sounds fussy and it works. A slightly under-filled table looks intentional; a completely full one looks like everything got put down at once.
That gap also gives you somewhere to put the knife, the first cut slice and the inevitable plate someone hands you mid-photo.
At Tings Bakery, we love seeing what people build around our cakes, and the tables that work best are almost never the most expensive ones. If you have a party coming up and are thinking about the centrepiece, browse our cake collections or drop us a WhatsApp message. We will help you choose something that earns its place at the middle of the table.